B&W Adjustments
There are many methods of adjusting a black-and-white image. If you have a bracketed scan you may want to apply an S-curve to each exposure/layer.
If the goal is to print negatives in the darkroom then there is another path to follow: try using digital techniques that provide insight into the printing process before you walk into the darkroom.
Split-Grade Printing
In my experience, the art of getting good B&W prints in the darkroom is mainly about finding the right combination of low-contrast and high-contrast filters. I usually make separate prints:
- Use high-contrast filters to knock down the shadows without obscuring detail that you would like to preserve.
- The low-contrast filter will produce a flat appearance, but is useful for promoting the widest range of tones.
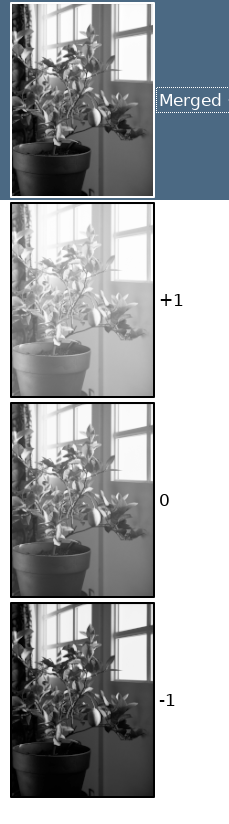
On the computer the simplest method I can find is to merge three exposures to collect the most information, then apply curves. Set precision to 16-bit integer (or greater) to avoid banding and to provide some room for further adjustments.
| Layer | Opacity | Adjustments |
|---|---|---|
| -1 | 100% | Set back point, white point |
| 0 | 33.3% | Set back point, white point |
| +1 | 33.3% | Set back point, white point |
| Copy Visible | 90–100% | Apply curves |
Final Preview
Push-processing provides a means of adjusting the density and contrast of a negative, but this will also change the way a print can be made. With practice, the digital copy will provide a very good indication of what your film is capable of.