Flash Photography
For the first time in fifteen years I bought a manual hot shoe flash—just to see what I could do with it. Also because I am aware of conditions where a flash would give me additional flexibility. The expense of an old speedlight or strobe is negligible, but I have not been eager to add it to my camera bag because I was weary of the complexity it could add.
The approach I have taken to learning how to use this device is to document specific arrangements where I have gained confidence that a flash will give me a good result. To my surprise, I have found a basic flash to be indispensable—I was simply missing a strategy for learning.
More About the Challenge
The most significant challenge to using a flash is that one cannot evaluate a scene by direct observation. For taking test shots a digital camera is a valuable tool, but it is still easy to settle on an arrangement unflattering quality. Experimentation has to be done ahead of a shoot.
Transferring settings back to a film camera with different properties makes having a reliable mental picture even more important.
Single-Flash Portrait
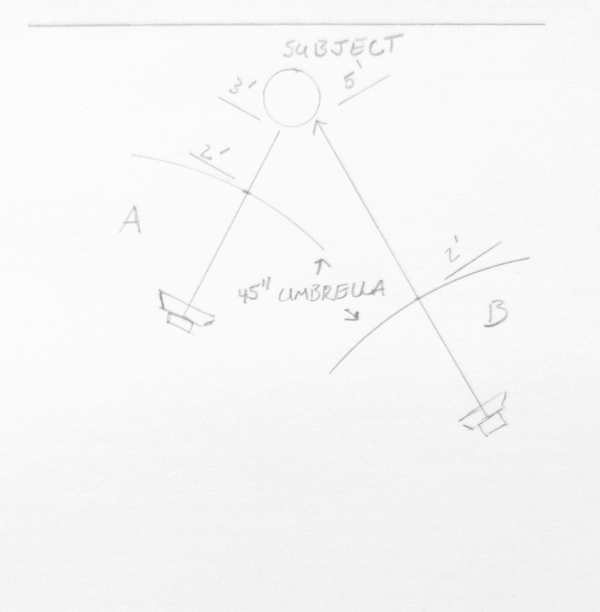
A shoot through umbrella must be the most compact and easiest way to spread light. To use it I need available light for focusing, but stray light will create a problem if it has a different color characteristics. One way to solve this is to use a leaf shutter and block out ambient light using a fast shutter speed.

| Flash unit | Godox TT6600 |
| Flash settings | 1/4 power (wide) |
| Exposure A (3') | f8 at ISO 200 |
| Exposure B (5') | f5.6 at ISO 200 |
| Guide number calculation | -2 stops |
| Shutter speed | Max sync for focal plane |
Complementing a 5500K Constant Light
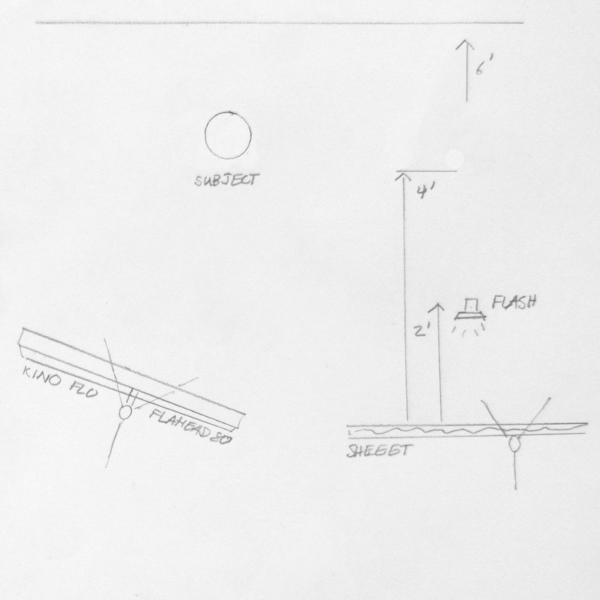
I typically use the Kino Flo Flathead 80 for studio shots, which produces beautiful soft light. The downside is that even with eight bulbs the low speed of film prevents me from using a shutter speed above 1/30. The Kino Flo is a valuable tool here for two reasons: it provides the benchmark for a high-quality light source for comparison, and it provides it keeps the area bright.
I don't know why photographers ever try shooting in dimly lit rooms. Without a sufficient deal of light pupils dilate, and accurate focus is difficult to achieve.
Clearly I need bounce or diffusion of some sort, but bounce flash was not measuring up. Until I tried aiming it at a white sheet. The results took me by surprise! With some practice I can light additional area in a way that is nearly indistinguishable from my constant lights.

| Flash to bounce surface | 2 ft |
| Bounce surface to subject | 4 ft |
| Bounce surface to backdrop | 6 ft |
| Flash unit | Vivitar 285HV |
| Flash settings | 1/4 power (wide) |
| Exposure | f4 at ISO 200 |
| Guide number calculation | -2 stops |
| Shutter speed to match Flathead 80 | 1/60 |
Indoor Event
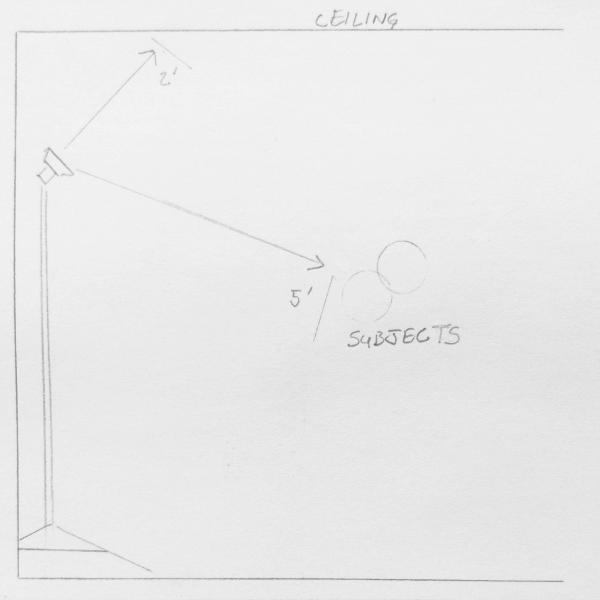
When photographing an event indoors I don't need to try balancing ambient light if I can create some directional character. Using a wide-angle diffuser on the flash and adjusting the head to throw some direct light gives me a way to create fill for the background and direction for the light coming to the subject. In the following schema I used B&W film and pushed it in development one stop.

| Flash unit | Vivitar 285HV |
| Flash settings | 1/4 power (wide) |
| Exposure B (5') | f5.6 at ISO 800 |
| Shutter speed | 1/256 (leaf) |
| Guide number calculation | -1 stops |
Graphing Power and Distance
The power is the square of the distance. Since flash power is set on a log2 scale this is easy to graph. Here are my experimental results at ISO 400 with the Godox TT600 at 35mm:
When using a 45" shoot-through umbrella, it seems that the umbrella reduced the guide number calculation by 1½ stops.